|
You'll need a few simple carpentry skills for this project which transforms a store-bought suet cage into a much more interesting and attractive suet feeder. |
|
| | |
|
|
|
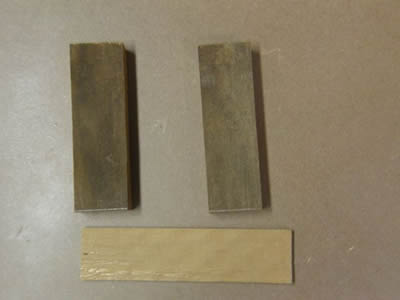
Using the suet cage as a guide, cut two pieces of wood for the sides. The wood should be about 1 inch x 1.5 inches and slightly longer that the suet cage. |
|
After measuring the total width of the cage and the 2 side pieces, cut to length another 1.5 inch piece of wood which will serve as the base. |
|| |
|
|
|
|
|
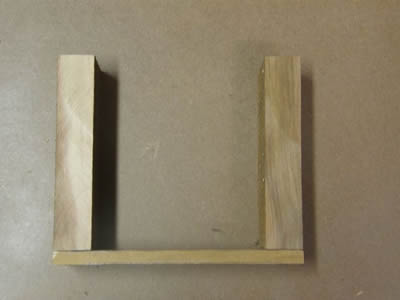
Carefully nail the base to the two side pieces. The suet cage should slide nicely into this little structure. Make sure the cage isn't too tightly enclosed. |
|
We've added a tail base which some birds will use for balance. It should be the same width as the bottom piece and about 7 inches long. Use whatever interesting wood you can find. |
| || |
 |
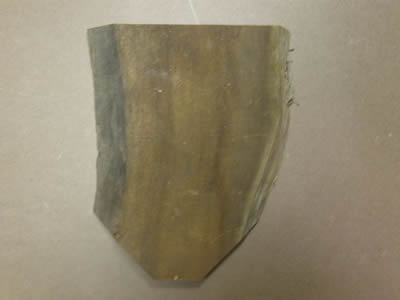
The top can be a piece of bark if you have access to some, otherwise any other piece of timber will easily work. Again, it's nice if you can find something interesting. It should be about 3 inches x 10 or 12 inches long. |
| |
 |
Open the cage and secure the little door to the underside of the top piece of wood (the bark).
We used a couple of wire staples that are hammered into the top. |
|
|
When finished, the cage will swing up and out allowing you to refill it with suet blocks. |
| |
|
|
|
|
Now it's time to nail the framed section you made earlier to the tail piece. |
|
The suet cage with the bark top should slide easily into the wooden structure. |
| |
|
|
|
|
|
After making sure the suet cage is fitted properly and flush with the uprights, nail the bark top onto the side pieces. |
|
If all has gone well, you should be able to push back the suet cage so that you can pop a suet block into the cage. |
| |
|
|
 |
|
 |
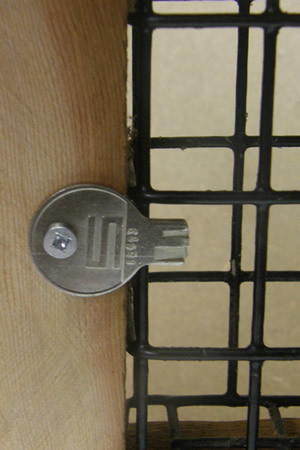
To keep the cage closed when birds come feeding, a simple turn button can be screwed onto one of the sides. We used an old key that had part of it broken off. On the left is the closed position and the open position is on the right. |
| | |
|
|
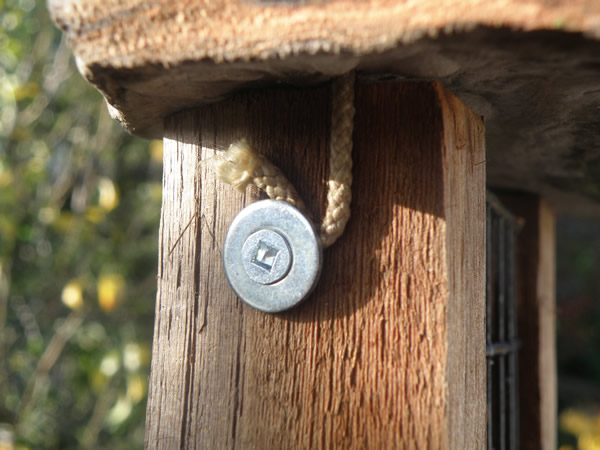 |
To hang your new feeder, simply use a piece of cord. Drill a hole at each end of the roof, just outside of the uprights. Make sure the hole is large enough for the cord. Next, screw a screw with a washer into each of the two upright pieces. Wrap the ends of the cord around the screw and then tighten. |
| | |
|
A Northern Flicker visits and uses the long tail piece as a support. |
| |
|
Hopefully the new feeder will be very popular.
This Downy Woodpecker seems to really appreciate it! |
|
| |
|
|
|