|
| | |
| Apex Nest Box |
| | |
 |
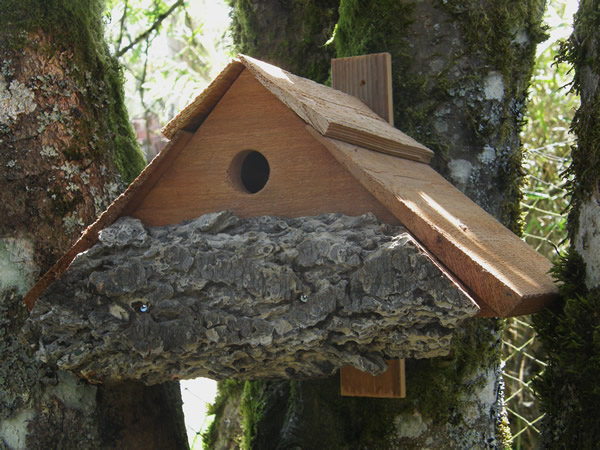
This project makes an attractive nest box using some simple supplies and carpentry skills.
To get started you'll need an 8 inch wide board for the back and front. We used a cedar board. You will need a base piece 5.5 inches wide and some materials for the roof such as pieces of bark or shingles. You'll also need a piece of wood for hanging, about 12 x 3 x .5 inches in size, some nails and 4 1.5 inch long screws.
Tools required include an electric saw, a drill with 1.25 inch and 1/8 inch bits, a hammer and screw driver. |
| | |
|
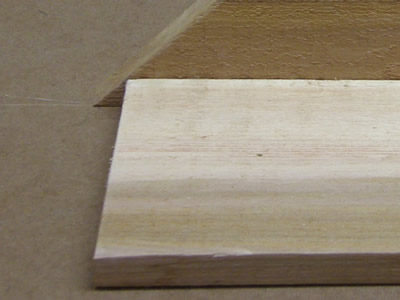
The back and front are 14 inches wide and 7.5 inches high, the actual width of the board. Mark the board along the bottom edge 14 inches and along the top edge, 7 inches. and then 14 inches. Draw a line from the starting point, as shown above. You should have a pyramid effect. |
> |
|
Cut out these two pieces. You now have the front and back of your nest box and some left over wood for other projects. |
|
| | |
|
|
|
In the front section, drill a 1.25 inch hole in the centre, about 2.5 inches from the top. Drill two 1/8 inch holes along the bottom of both triangular pieces to screw into the base. |
|
To determine the length of the base, hold the wood near the corner and just below the angle, as shown. Mark this point and repeat at the other end. Cut the base wood to fit between the two marks. |
| |
__ |
|
|
 |
The back and front pieces can now be screwed into place. |
| | |
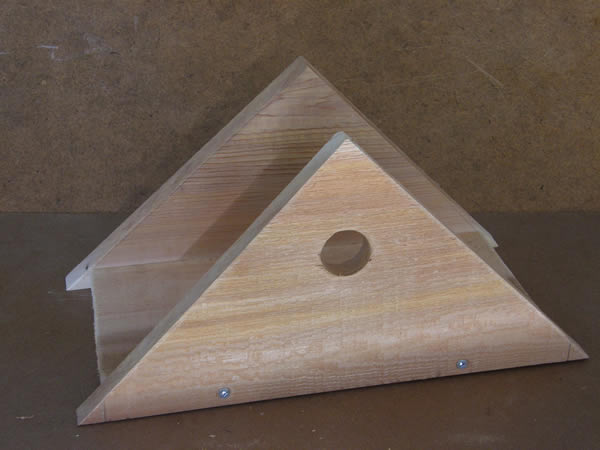 |
The project should look like this at this point. |
| |
|
We used some left over shingles that we had in the workshop to make the roof. Allow a little overhang on the front, but keep the back flush with the back end to allow for the hanging wood (also called a batten) to be easily attached. |
| |
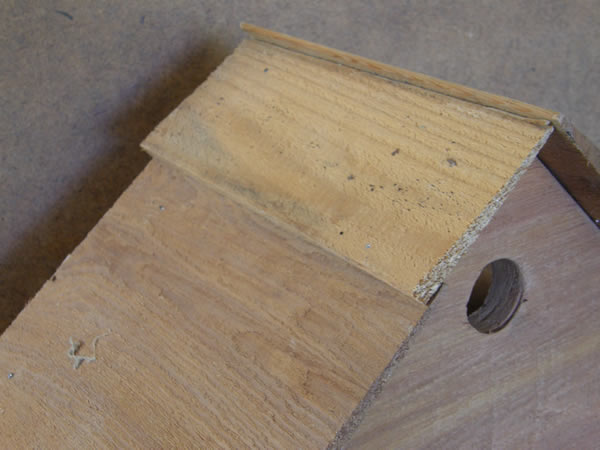 |
Attach the roof pieces with nails. Use your creative ideas such as old weathered boards or driftwood is you don't have any shingles handy. Letting the top pieces overlap the bottom ones can offer extra protection from the rain and are very attractive. |
| | |
|
Screw the hanging batten into place on the back, allowing about 2 inches above and below the nest box so you can attach it to a tree or post. We added a piece of bark on the front to make it even more attractive. |
| |
|
|
|
|
|
Home | All Things Natural Restaurant | Bird's Nest Lounge | Cyber Room | Lagoon Trail | Naturalist's Nook | Wildflower Garden | Woodlands Pathway
Site Map | Inbox | FAQs | News and Updates | Newsletter Information | Games Room | Privacy Policy
All content © Dereila and Sage Innovations
|